The Dynjandi Waterfall Hike, Step by Step
I have walked the Dynjandi waterfall hike more times than I can count, most Julys with a group behind me and a few winters completely alone. It is short on paper, 1.8 kilometres there and back, and short is not the same as easy. Photographs taken from below hide the climb, the way the ground changes under your feet, and the ten minutes near the top when the path gets genuinely slippery. This guide covers that stretch on its own: what the surface actually does, the six smaller falls you pass without noticing unless someone points them out, and what you can still see if the climb itself isn't for you. For the tours that give you the most time to do all of it properly, see Dynjandi waterfall tours with the longest stop.
Quick answer
The walk from the Dynjandi car park to the base of the main fall covers 1.8 kilometres round trip and about 100 metres of climb, roughly 15 minutes up at a steady pace and 30 minutes there and back without stopping. Give yourself an hour to an hour and a half if you want to see all six lower falls and stand at the base properly.
Key takeaways
- 1.8 km round trip, about 100 metres of climb to a high point near 105 metres above sea level
- 15 minutes up at a steady pace, 30 minutes minimum for the round trip
- The path was built by volunteers in 1996 and is fenced for most of its length
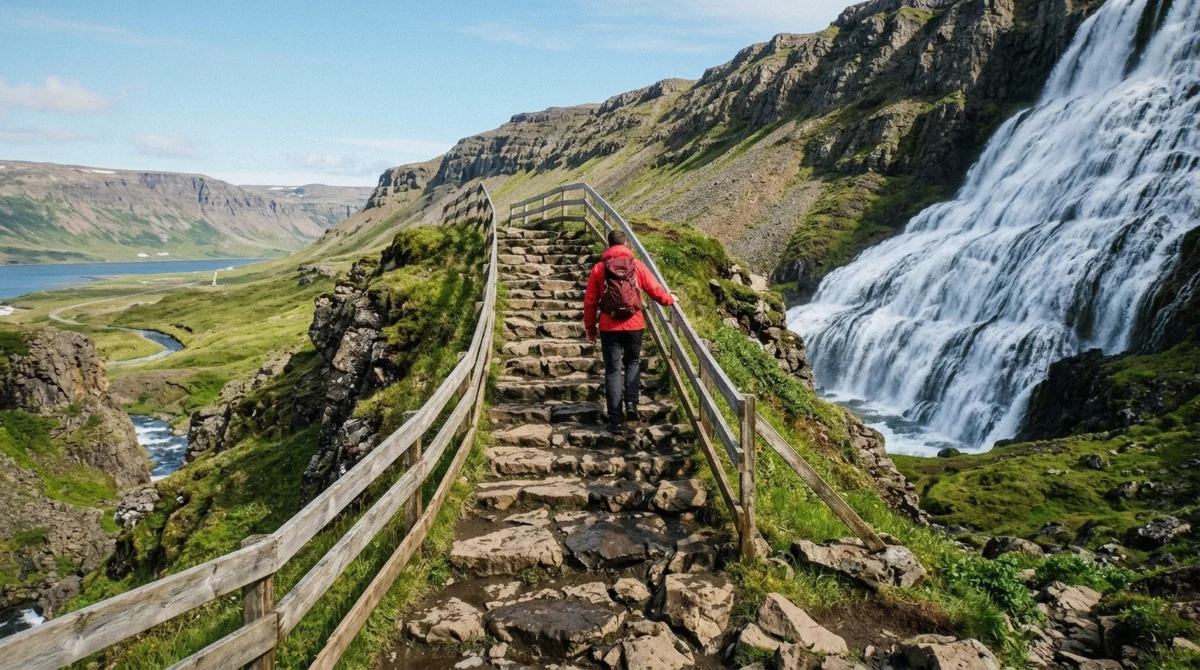
- Footing changes three times: paved and level, then packed gravel, then loose stone with built steps
- The top stretch gets slippery from spray, and midges can swarm the path on still July afternoons
From the Car Park to the Base
What the walk actually covers
The path climbs about 100 metres over 0.9 kilometres to the base of the main fall, 1.8 kilometres once you count the way back down. The high point sits close to 105 metres above sea level, which sounds like nothing until you're standing on it with wind coming straight off the fjord. Volunteers built the stone path in 1996, replacing a rough track worn by however many boots had gone up the slope before it. It is fenced for almost its whole length, not to slow you down but to keep the season's foot traffic off the moss and thrift growing on either side.
I still see people step over the fence for a photo most weeks. Don't. The vegetation here doesn't recover in a single summer, and the fence is doing its job whether you respect it or not.
How the ground changes under you
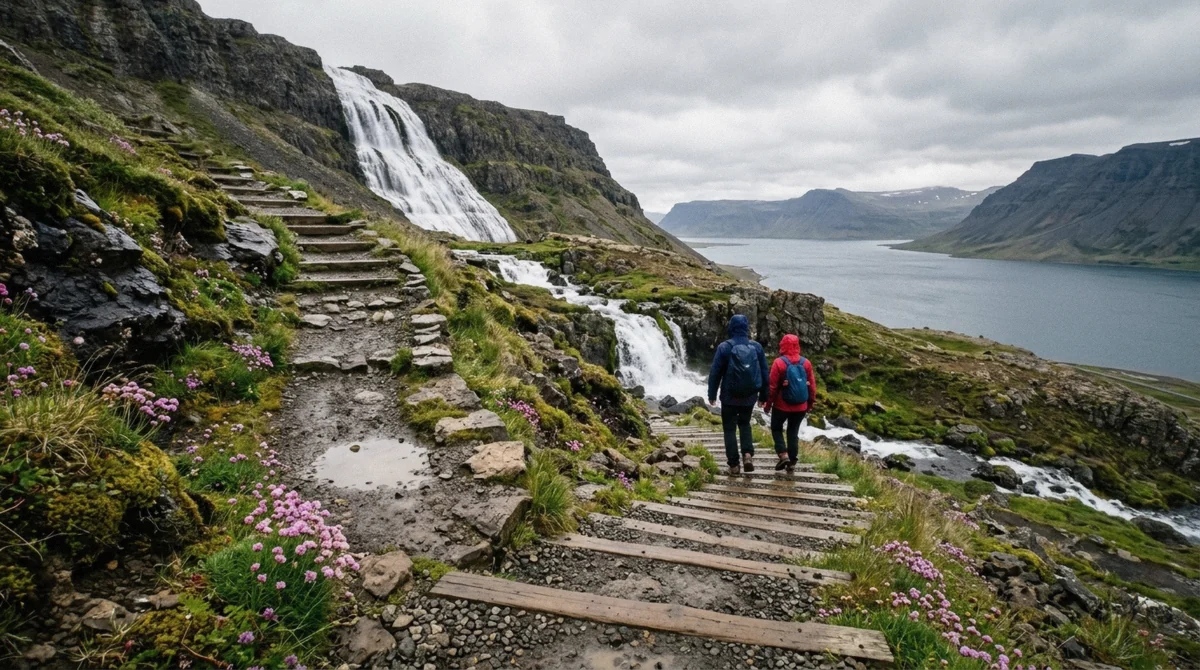
The lowest stretch is paved and level, flat enough that I've watched a parent push a pram to the first viewpoint without breaking stride. Past that, the surface turns to packed gravel: honest walking, nothing technical. The real change comes in the last third, where gravel gives way to loose stone and a run of built steps that carries you the rest of the way to the base.
That upper section gets wet from spray on almost any day with wind behind it, and wet stone is slippery stone. There's no railing at the base of the main fall and no barrier on the outer edge of the path higher up, so watch your footing rather than the waterfall on that last stretch, and look up once you've stopped moving.
Midges on a still July day
On a windless afternoon in July, midges can swarm the path badly enough to matter. A traveller wrote in this July to say they wished they'd packed a mosquito net or at least a hat that covered more than the top of their head. It doesn't happen every day, since wind usually keeps them down, but a still, damp July afternoon at Dynjandi is exactly the kind of air they like.
Check the forecast before you leave Ísafjörður, and pack for it if the wind isn't there to help you.
What to Wear and Carry for This Climb
Operators running to Dynjandi ask for comfortable shoes and weather-appropriate clothing, which covers very little of what you actually need on this specific climb. Here is the shorter, more useful list.
- Shoes with real tread, not smooth-soled trainers, since the top third of the path is loose, wet stone
- A windproof outer layer, since the valley funnels wind straight at the base of the falls
- A hat that covers your neck, or a head net, for still July afternoons when midges are out
- A cloth for your lens or phone screen, since spray coats glass within seconds near the top
- A bottle of water, since there is nothing to buy once you're on the path
- Trousers rather than shorts, since the fenced sections brush wet vegetation against bare legs
- A free hand on the last stretch of steps, so keep the phone in a pocket until you've stopped moving
The Six Falls You Pass on the Way Up
Dynjandi is not one waterfall but seven, the main fall and six smaller ones stacked below it on the same climb. Most visitors walk straight past four or five of them, eyes on the big one waiting at the top. Bottom to top, here is what to actually look for.
| Fall | Where on the climb | What it looks like |
|---|---|---|
| Bæjarfoss (also called Sjóarfoss) | Right by the car park, before the paved path proper begins | A narrow drop close to the track, the one most people photograph on the way in without stopping |
| Hundafoss | On the paved, level stretch | A modest step folded into the slope, easy to miss while you're watching flat rock underfoot |
| Hrísvaðsfoss | Where the path turns to packed gravel | Wider than the two below it, spreading across a shelf of dark rock rather than dropping in one line |
| Göngumannafoss | About halfway, where gravel gives way to loose stone and the first built steps start | Close enough to the path that spray reaches you here on a breezy day |
| Strompgljúfrafoss | High on the climb, inside the slippery upper stretch | Cut into a narrow gap in the rock, more heard than fully seen from the path |
| Hæstahjallafoss | The last stage, right at the top of the built steps | The final small drop before the ground opens onto the base of Dynjandi itself |
There's a seventh, Kvíslarfoss, on a side branch of the river away from the main path. Most people never see it, and you don't need to go looking for it to say you've done this hike properly.
How Far Up You Actually Need to Go
Three places on the path give three different pictures of the same waterfall, and only one of them requires the whole climb. People who tell me they were rushed usually set off for the base without deciding whether they wanted it.
| Stop | From the car park | Ground | What you get |
|---|---|---|---|
| Lower viewing area | 2 to 3 minutes | Paved and level, fine for a pushchair | The whole fall in one frame, Bæjarfoss beside you |
| Mid-path viewpoint | About 8 minutes | Packed gravel, gentle steps | Side-on angle where the fan is widest, the fjord behind you |
| Base of the main fall | About 15 minutes | Loose stone, built steps, wet rock | Spray on your face, no railing, the noise that gives the fall its name |
If you are on a schedule, the mid-path viewpoint is the one I would spend your time at. It is where the shape reads best, and it costs you eight minutes instead of fifteen. Save the base for a day when nobody is waiting on a bus.
How Long You Have, and What to Do With It
If you have 30 minutes
walk to the mid-path viewpoint and back. Do not attempt the base; you will spend the whole time watching the clock
If you have 45 to 60 minutes
climb to the base, stand there for five minutes, come down past two or three of the lower falls
If you have 90 minutes
do the full chain slowly. This is what the guided day trip from Ísafjörður is built around
If you cannot manage loose stone or steps
stay at the lower viewing area. It is paved, it is level, and it sees the entire 100-metre drop
If you are carrying a small child
go as far as the mid-path viewpoint. Above it the steps are uneven and the outer edge is open
How Hard Is the Climb, Really
Every hiking source I've read calls this walk easy, and on a dry day in good shoes, it is. What that word hides is the footing: loose stone, spray-wet rock, and a fence that keeps you on the path but won't catch you if you slip. I'd call it easy but not casual. You can manage it in trainers if you're careful, and you can also turn an ankle in trainers if you're not.
You can walk all the way to the base of the main fall. The built steps carry you the full climb, and nothing gates or stops you short of it. What you won't find there is a railing: the base of Dynjandi is open, uneven rock, and the outer edge of the upper path has nothing between you and the slope either. Go at your own pace on that last section and you'll be fine. Rush it because someone behind you is waiting, and you won't be.
The trip most people take, the guided day trip from Ísafjörður, gives about ninety minutes at the falls, enough for the full climb plus time to catch your breath at the top. Shore excursions padded with a village stop, like the trip paired with Flateyri, often leave you closer to forty-five minutes to an hour, which is tight if you want to see all six lower falls on the way. The farm-visit shore excursion runs similarly short, enough for the climb but not much beyond it, so build in extra time yourself if reaching the base matters more to you than anything else on that itinerary.
If the Climb Isn't for You
Not everyone on a shore excursion or a tight schedule can manage a hundred metres of wet stone, and Dynjandi doesn't punish you for that the way some Icelandic sights do. The full staircase of falls is visible from the car park itself, wide enough that you don't need to be standing under it to understand its shape. The lowest stretch of path is paved and level, easy enough that I've watched a pram reach the first viewpoint without trouble, and that first viewpoint already puts you close to Bæjarfoss with a clear line up the slope toward everything above it.
If a knee, a hip, or uneven ground generally rules out the loose stone higher up, that first paved stretch is not a consolation prize. It's a real, complete view of why people come here, just from a little further back. The car park itself has toilets open year-round if you need them before or after; for the drive down from Ísafjörður, see how to get to Dynjandi waterfall.
Questions About the Hike
How long does the hike up Dynjandi take?
About 15 minutes up at a steady pace and 30 minutes round trip if you don't stop. Give yourself an hour to an hour and a half if you want to walk the full 1.8 kilometres past all six lower falls and spend real time at the base.
What should you wear to hike up Dynjandi?
Shoes with real grip rather than smooth-soled trainers, a windproof layer, and trousers rather than shorts, since the fenced sections brush wet vegetation against bare skin. In July, pack something to cover your neck and head for still, midge-heavy afternoons.
How difficult is the Dynjandi hike?
Easy by the numbers, about 100 metres of climb over 1.8 kilometres round trip, but the footing gets genuinely slippery near the top from spray, and there's no railing at the base. Manageable for most people who take their time, harder than the distance alone suggests.
What should you do if you can't manage the climb?
Stay on the lowest, paved stretch of the path, which is level enough for a pram and reaches the first viewpoint. The full staircase of falls is also visible from the car park itself, so you don't need to reach the base to see the shape of what you came for.
Why do midges swarm the path in July?
Still, damp air on a windless afternoon is exactly what they like, and spray from the falls keeps the air around the path damp all summer. Wind usually keeps them down, so check the forecast before deciding whether to pack a head net.
How many waterfalls will you pass on the way up?
Six smaller falls sit below the main drop on the same climb, from Bæjarfoss near the car park to Hæstahjallafoss just before the base. Most people walk past four or five of them without noticing, since the main fall pulls the eye the whole way up.
None of this is a hard walk. It's a short one that punishes carelessness in its last hundred metres, and rewards a bit of patience with a close view of a waterfall most people only ever see from a distance.